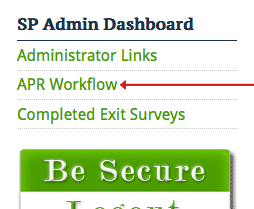
1. In the right sidebar, under header "SP Admin Dashboard", click on the link called "APR Workflow"
2. The link takes you to a page with all APR submissions (not a lot in this example).
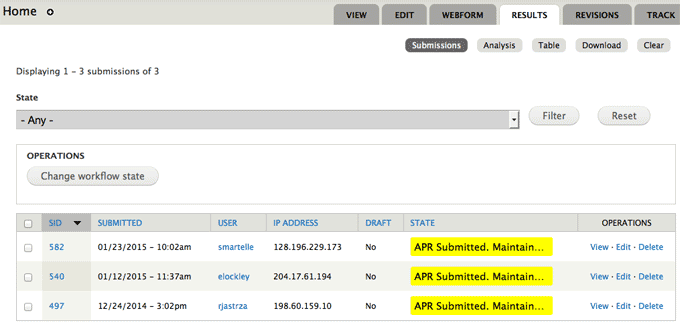
3. Yellow indicates an APR has been submitted and it should stay that way until the student meets with mentor/advisor and returns their signed sheet (to you). Once you have received a students signed sheet, look for their netID in the "USER" column, and then tick the corresponding check box in the first column.
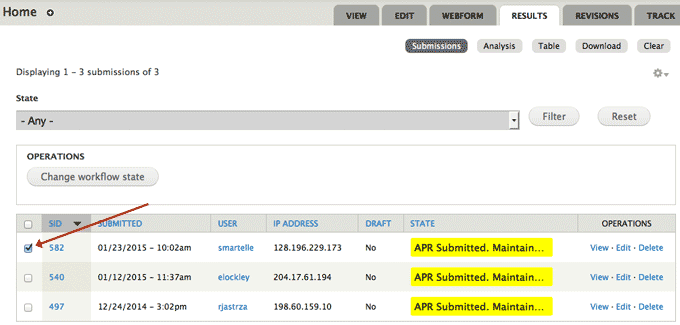
You are selecting the APR(s) you want to change the state of. Note that you can select more than one APR at a time to bulk process APR states so that you don't have to go through this process for each and every APR.
4. Once you have selected the APR(s) you want to change the state of, click the grey button "Change workflow state" just above the submissions table.
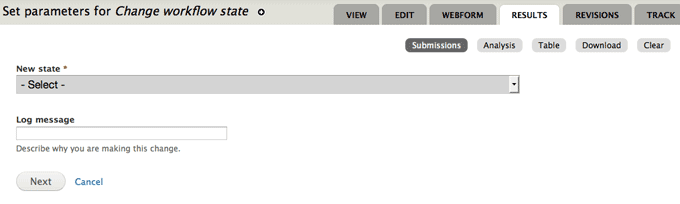
5. This next page gives you a drop down menu to choose from.
Click on the drop down menu and choose "APR is now complete, student has met with advisor and turned in paperwork."
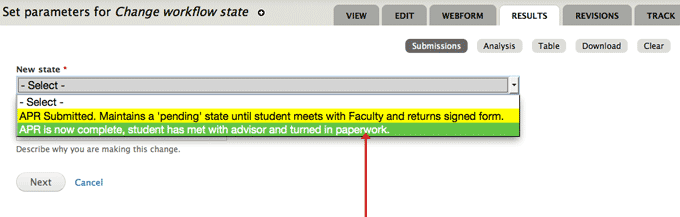
6. Click the grey button "Next".
7. This next page will list the submission ID numbers that correspond to the APRs you selected. In this example it's just one, if you have selected multiple APRs there will be a list of ID numbers.
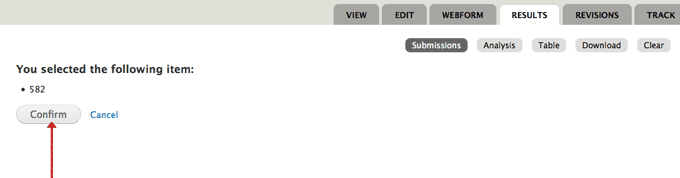
8. Click the grey button "Confirm" to confirm you are changing the APR(s) state.
9. Next, you will see a confirmation message in a green box indicating you've successfully changed the state and that emails have been sent to the submitter(student) and their corresponding advisor (both indentified by netIDs).
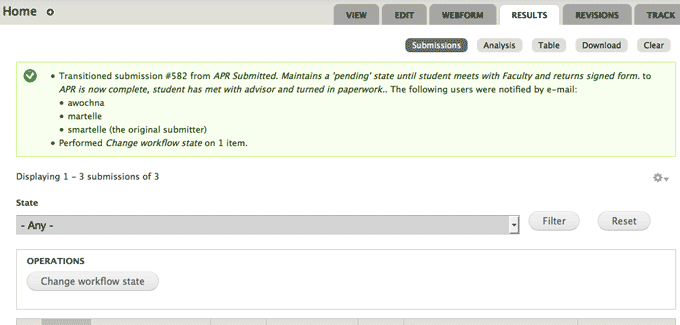
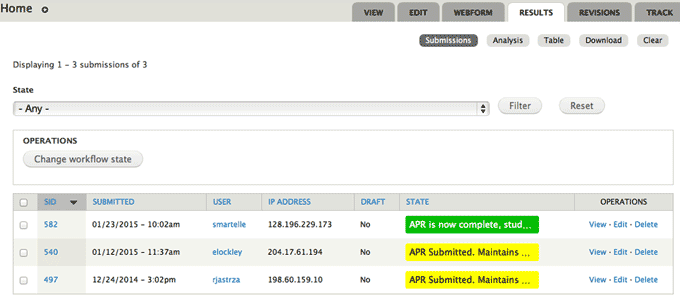
10. That's it! Now when you visit the starting link "APR Workflow", the APR(s) you processed will now be green.